Showing posts with label DIY. Show all posts

Wednesday, March 11, 2015

Momma Kits/Stations

I have been spending so much time on Pinterest lately, it's a little ridiculous. Wait, what am I saying?! There is no such things as too much time on Pinterest. =) I have the nesting feeling but I'm not at the point where I'm acting on it impulsively, hence Pinterest. I currently feel the need to pack our hospital bags and make tons of kits or stations for after the baby is born. I will be updating this post as I actually create the kits/stations.

Here is the to do list I have made:

  • Hospital/Diaper Bags (whole separate post coming)
  • Breastfeeding Snack Station
  • Breastfeeding Living Room Kit
  • Diaper Changing Kit
  • Momma Bathroom Kit
  • Baby Medicine Kit (tacklebox)
  • Baby Car Kit
  • Postpartum Kit
  • New Daddy Kit
All of these, I have found and pinned on my Pregnancy or Baby boards on Pinterest. I cannot wait to get started. Is that sad? I don't think so either. =)

The Breastfeeding Snack Station is on the blog Unskinny Boppy under a post called The Gift that Keeps on Giving. The author originally gave it as a gift to a friend who had just had a baby. I think it would be a great gift to give myself. =) Also, it's a really easy way for J to know what I need when I'm breastfeeding. I know he really wants to bond with the baby but he is being super supportive of my desire to breastfeed as long as I can. He also has a servant's heart and I'm sure he would be able to restock this station easily without having to ask for my opinion.

The Breastfeeding Living Room Kit, Diaper Changing Kit and Momma Bathroom Kit were all found on a blog called Healthy Tipping Point. The post was called New Mom Survival Stations. I will definitely be creating these small kits.

The Baby Medicine Kit is found in 2 posts on All Four Love's blog. The first post is just called Baby Tackle Box. The second post is called Restocking Baby Tackle Box. She goes into more detail on what is in the box since she is restocking it for her 2nd child. She breaks it down by types of medicines you will need for 0-12 months. So excited to make this!!

The Baby Car Kit is something that I've been wanting to do before I even found it on Pinterest. I'm just so glad I don't have to reinvent the wheel! This is in addition to the diaper bag but it ALWAYS stays in the car. Two Twenty One wrote a post on the Baby Car Kit. Loving this idea.

I also think a Postpartum Kit is a great idea. I mean, I will have just brought another human into the world. =) I found this idea from Tall Mom Tiny Baby. The Ultimate Post-Partum Recovery Kit shares what she gave to a friend who had just had a baby. 

The last kit I want to make is for J. Most of the gifts we have been getting are for the baby or me. I want him to feel included and loved. I found the New Daddy Kit on a blog called Life with My Littles. It was part of her blog post I love called 25 Things to Do before Your Baby Is Born. I can't wait to make this for my beloved and see his face when I give it to him!

I would love to hear of any ideas you have to put in the kits or any other kinds of kits you think would be a good idea. I hope to update you soon on the progress of these kits!


Saturday, January 17, 2015

Nursery Artwork

There are a few purchases that I have made for Gumdrop already. Well, mostly for the nursery. Some of them make me so happy that I can't help but get giddy about them. The first one is the pair of little orange shoes that we bought to make our announcement photo.


I was sooo excited when I found orange sneakers. It's hard to find gender neutral shoes for a picture, much less ones in orange. If you don't know, J and I graduated from Oklahoma State University. So, we love orange and consider it the most gender neutral color. =) Every time I look at these shoes, I get so happy. We even had them hanging on our fridge with the ultrasound pictures.

Another purchase I made was a set of printables for the wall. I found them on Pinterest. Who doesn't find stuff on Pinterest these days? Anyways, I thought they were perfect because they had white & gray backgrounds, verses, elephants, and orange text. I went to Etsy to buy the prints from igivelove's Etsy shop. These were the original set.


Of course, she was have an end-of-year sale so I could buy one more item and get another free. One of my choices was this print.


I love the verse and what it means to me. J & I have been together almost 9 years, 6.5 of that being married. We wanted to start our family earlier in our marriage but decided it wouldn't be the best idea, especially since I wanted to be a SAHM (stay at home mom). I really wanted to start a family but I desperately wanted to be a SAHM. So, we decided it would be best for us to wait until we were a little older, J finished grad school, and he got a job that could support my dream. And here we are! J will graduate from PTA (physical therapy assistant) school in May and our little Gumdrop plans on arriving in May. God's timing is more perfect than I could have ever thought. The desires of my heart are being answered...5 years later. I look back on it and realize that it would have been really hard to have a baby right out of college and to be a SAHM. I don't think was ready then either; but then again, who is ever really ready to have a baby & be responsible for another person's life?

Ok, back on topic here. The last print that I got from igivelove's Etsy shop was this one.


I love the quote, the polka dots, and that it went with the others. As you can tell, they don't match each other or my colors (except for the set. So, I messaged the shop owner and asked if I could get the 2 single prints to match the "Dream Big, little one" print in the set. She was so kind and changed them for me without any strings attached. Here is what they all look like together & in the frames I chose.


Now, I just need to decide where to hang them on the wall. I'm thinking where my weekly chalkboard is. It's the only wall space that is big enough for all 6. I'm leaving the space above the crib for the monogram letters I'm going to DIY later. 

The most recent artwork I have purchased is from an amazing shop called Scarlet & Gold. It was actually created by a childhood friend of mine. Her team creates amazing prints, canvas prints, and even phone cases, plus so much more. You have to check them out. I was buying prints for my mom & sister-in-law for Christmas on the shop and I got one for the nursery too. It is one that features Psalm 139:14. You can get it here. This is what it looks like in the frame I bought for it.


The last thing in Gumdrop's nursery is something I actually made myself. It was a craft night with the girls' project. We took 5 pieces of pine, stained them, screwed them together with braces - like this -


and then traced typed words onto the front and filled the words in with paint pins. Unfortunately the brackets we used on the back were too tall so I had to angle mine in odd places to make sure I got a screw into every board in both brackets. However, the front turned out great, if I say so myself. 


I love surrounding Gumdrop's room in Scripture. Every piece feels like a prayer surrounding him/her. I cannot wait to put more cute stuff into the space. I've put this on top of the tall cube shelving next to the crib. 


I hope to show you some more progress soon.


Thursday, October 31, 2013

Halloween Decor

So, I haven't been extremely crafty lately. However, I am getting better at decorating with what I have. I've gotten a few new and fun items to decorate my apartment. Thanks to the hubs for letting me "splurge" on a couple things. And by splurge, I mean use a 40% off coupon at Michael's. =) Here are a few of my new favorites for Halloween.


This was actually a Christmas present from the hubs. =)

Fall and Halloween are easy to decorate for because some of your fall decor can be used as Halloween decor (i.e. pumpkins). My apartment shifted from Fall to Halloween on October 1st. Yes, I feel that each holiday deserves a solid month of having decorations out. I love all my new purchases but I love my crow. For some reason, I thought it was totally necessary for Halloween decor. I was hoping to put him in my birdcage but we are having difficulties figuring out how to hang that cute, pink thing in our apartment. So, this is what I have done for this year.


I'm thinking this is a pretty good compromise, for now. Another Halloween decoration for me is my BOO Jars. Remember these? Well, this is what they look like in our apartment...with my new purchase.


Printables are also a great way to update your decor often but without much work. Also, if you build up a stash of holiday printables, this display will never look the same two years in a row. Love knowing that. Here are my 3 frames that I always have out; this time what they look like this Halloween.


I got 2 of these printables from Blooming Homestead. There are multiple versions of the 8x10 pumpkin-shaped subway art. The link I just provided you also has the printable for the 5x7 crow. The 8x10 subway art in the vertical frame was found on The Petersen Post. I loved how it was in traditional colors but done with modern fonts and patterns.

Hope you have a Happy Halloween!

B Amy

Tuesday, July 24, 2012

Family Established Art


I made this! I am beyond proud of myself. I even got it done BEFORE our 4th anniversary (July 12)!!

Every time I'm on Pinterest, I see something like this. I really had to play with how I wanted this to look because of the length of our last name and the short numbers in our anniversary date. Did I want 7-12-08? 07-12-08? July 12, 2008? Did I want a square to say "Est."? Vertical or horizontal? Color or black & white? This is something you will have to determine for yourself.

Once you decide the look & what it will say, the hard part begins. I'm not kidding. I used Leo Reynolds' Flicker account to pick the images I wanted. He has graciously allowed people to download his pictures for free. Here is the link to just his Letter Collection. Click on it. Do you see why I said the hard part is just beginning?! He has sooo many choices. Here is a link to his Numbers Collection 1. Yes, there is more than one number collection but the one I have linked has what you need for this project. I searched the rest of his Flicker account to find the heart & medallion. I used a medallion to separate our last name & the date, pretty much a space filler.

Once I had picked the images I wanted, I opened up a Word document in the publishing view. I then placed the images where I wanted them, resizing them to 1.64" square (except the hearts). In publishing view, you can make sure that all of your images are lined up & equally spaced out a lot easier. I made the document an 8x10. This way, when I printed it from my computer, I could cut the 8.5x11 piece of cardstock to size and and none of the images would be cut off or off center.

Here is what it looks like in a frame.


I hope this inspires you to make one of your own! Let me know if you do!


Monday, July 9, 2012

DIY: Family Scrabble Board

A very sweet family friend made us this family Scrabble board. She comes to visit the ranch whenever her family can get away from their jobs. This board was for us to put on display at the family ranch.


Now, my brother is engaged. Her name is Michelle. The only letter they have in common is the I. No way that it would fit where his name is now. So my puzzle brain went into high gear looking where names could move to fit my new "soon-to-be" sister. There is only one place Brian's name could move. Can you see it?


And now I'm sure you know where Michelle's name is going to go.


Why is there no M you ask? Our family friend gave me the new letter I needed for Michelle's name. She accidentally gave me a W instead of a M. Can you guess what I did?


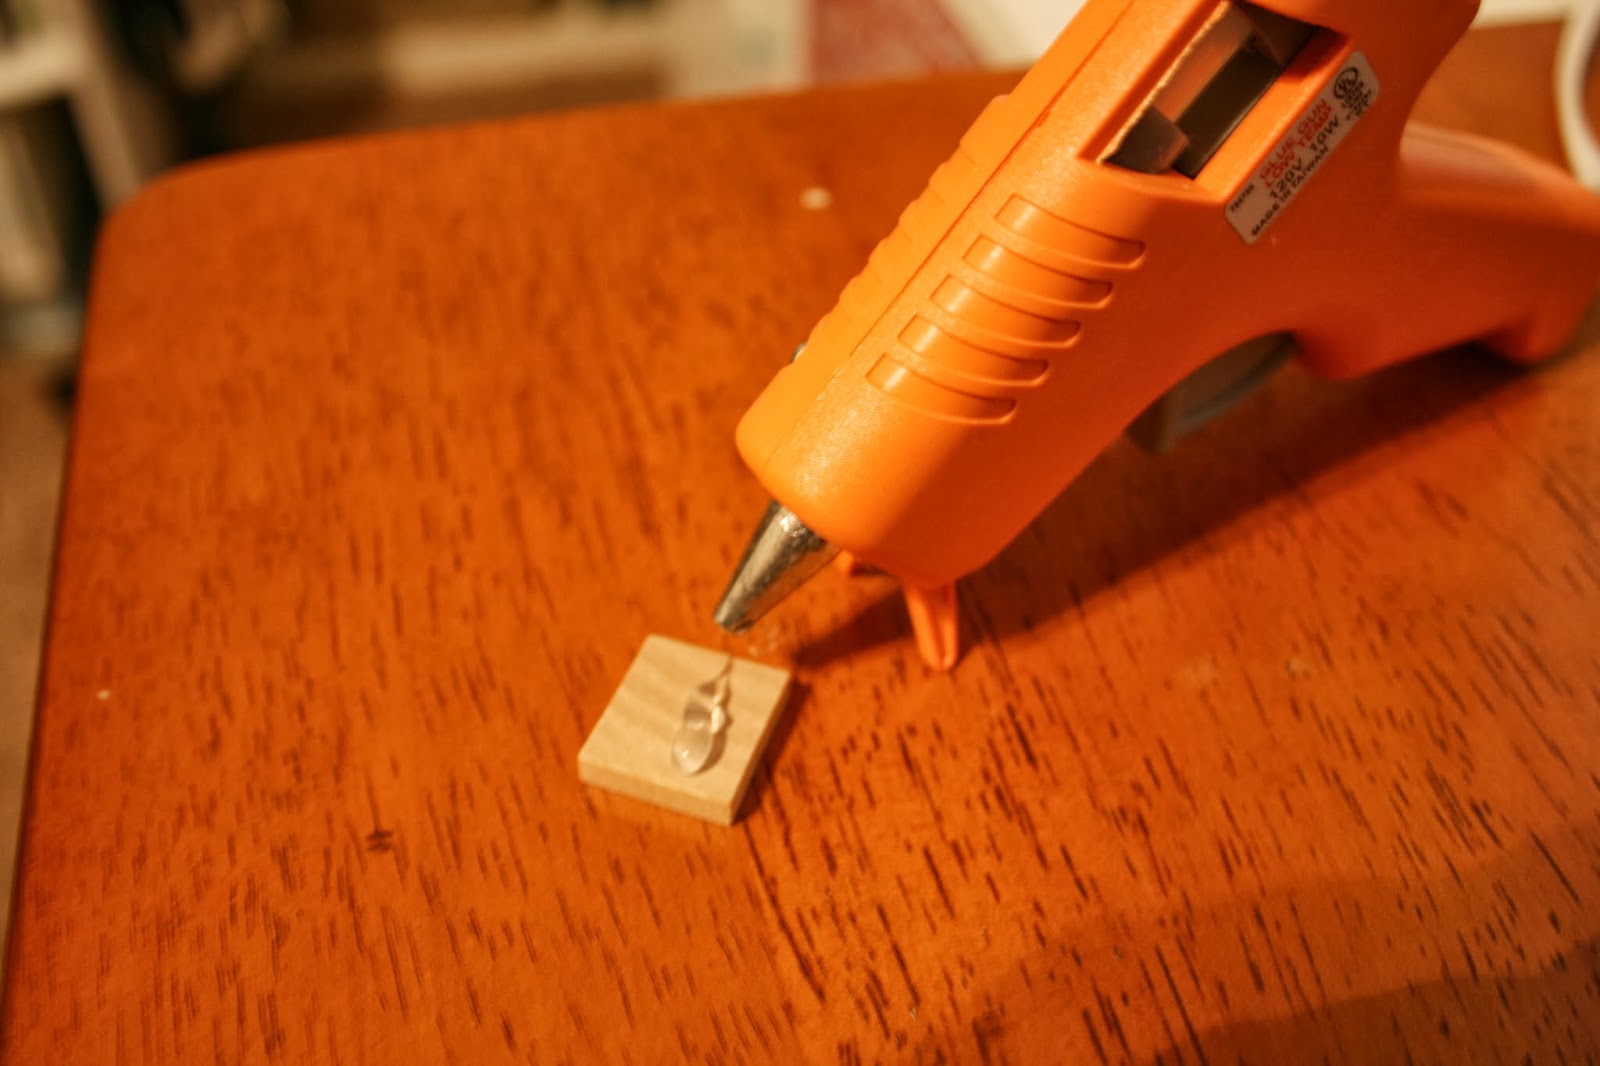
I will post a final picture whenever I get the last M that I need. All of the letters are just hot-glued to the board. Well, hot-glue on the back of each tile & then stuck onto the board.


See? I hope you can use this to jumpstart your creativity.


Thursday, July 5, 2012

DIY: Ranch Clock

This project has been going on for awhile. And I have to give most of the credit to the hubs. Over Memorial Day weekend, he started turning this project into a reality for me.

Ok, so I have a problem. Ok, many problems but I'm focusing on one here. I have to have a clock (& box of kleneex Puffs brand) in every room. I mean every room. Of course, including the bathroom. 

At my parent's ranch, we didn't have a clock. And it seems to be our most permanent "home" right now. J & I have always had the same room (#4) and we can decorate it however we want. It's not done yet; but after yesterday, it's sooo close! I have always wanted to have a clock in that room.

I bought this kit at Hobby Lobby around April since we couldn't find a "ranch clock" anywhere.
$39.99
Expensive but worth it.

This is what it is supposed to do. Just stick it on the wall.


J figured he could make a really simple one himself with some scrap wood in the "barn" at the ranch. (We don't have animals out there so we call the huge workshop/garage a barn.) That would make our cost just the kit.

So, I started to search Pinterest for wooden clock ideas. What else is a girl supposed to do? =)


I found this and I liked that it was a pallet first of all. But I love its size, contrast of colors & the roman numerals. The hands are a little to frail for a room at the ranch though. This came from Dusty McRae's blog asking you to Cherish Life.


Next, I found this clock. I LOVED the staggered wood & the roman numerals. Otherwise, it seemed a little small. Our room has 10' ceilings. It needs a large clock. This came from Shelterness and a post of 20 Original Salvaged Wood Decor Ideas. Its picture #8. =)

After I was done finding inspiration, J knew what I wanted. I went shopping at an outlet mall Memorial Day weekend and came back to find this.


This is his master plan! Isn't is great? He opened up the clock kit, saw the spacing it said it needed for the hour & minute hands, drew a plan & then made it.


Isn't it gorgeous?!?! I love the staggered wood, the stain color, the enormity of it...I love it when J can read my mind. =)

Again, is this stain not beautiful?!

Notice the 2 nails. Explained later.
He took a whole bunch of 2x4 pieces of wood and place them in a staggered pattern that he thought looked good. He turned them all upside down and backed them with other 2x4s. He then used a nail gun to connect the bracing pieces to what became the back of the clock face. There are no nails in the front this way. Just perty wood! (say it in a hick accent)


Yesterday, we were back at the ranch for the day & so we decided to finish the clock instead of helping cut down dead trees. Literally. 

If you noticed the 2 nails in 2 pictures up, those were for the clock kit. The hands are battery operated so that you can easily move the clock from one wall to another. Well, we used those nails and the battery pack & clock hands leaned forward. So, we came up with a solution.


Screw gun! Haha. When you can't get nail to hold something steady, use screws. We screwed the back of the battery section down to the clock's face.


It's not going anywhere! =)

We then reattached the rest of this piece which hid the battery & inner-workings & held the clock hands.


Next, we placed all of the roman numerals where we wanted them. J was awesome & actually marked places when he first made the clock. He followed the template that came with the clock & then measured them farther out for how big he wanted the clock.

Can you see the marks?


I chose not to put the numbers upside down like the 1st inspiration pic (and most roman numeral clocks) because....ok I'm lying. I didn't notice that they always go upside down. BUT, I really like that they aren't upside down. This isn't a traditional clock; it isn't round!

The numbers came the way you see them. Well, in 2 long strips and I cut them into the individual numbers for placement. What I'm trying to say is that they came as contact paper & with transfer paper already on them.

Very first thing: Clean the surface you are going to stick the numbers on. I did a dry rag followed by a damp rag to get any hidden sawdust (or dust in general) off of the surface.

Step one is to take the backing off the numbers.

See? Contact paper & transfer paper.


Hubby is awesome at indulging me with my picture documenting obsession. I'm sure you find this obsession helpful. Right?! 

Step two is to smooth the numbers onto the surface you want them. For me, it was the wood; you might be using a wall. Be sure there are no air bubbles!

Ugly nails, moving fingers. Bleh!
(I'm not a fan of my skinny, long fingers. Ok I am but not my nails.)
But thanks Hubs for taking the pic!

Step three is you let them sit while you do the rest of the numbers.


Step four is to (very carefully) remove the transfer paper from the number fronts. Since mine were on wood, it didn't want to stay some of the time. I forced it to stay. =)

What is with those ugly nail beds?! Oh sorry. Not about me.
Step five, admire the beauty!

Yes, I know the picture was taken to make it look upside down.
I was sitting at the top of the clock.
Step six, OOHH  and AAHH.


Step seven, fix the hands on the clock to read the correct time.


Step eight, stand next to it to prove how tall it is (because I'm 5'8").

Um, yeah, It's over 5 feet tall. I'm 5'8".

Step nine, hang it on the wall. This turned out to be an ordeal because of how heavy and big the clock ended up being. We found where the center of the clock's weight was to determine where to put the hanging device. We ended up using the top 2x4 brace as our location for the hanging device.

You must be wondering why I'm calling it a hanging device and not some name you're used to. It's because we made it ourselves. Yes. We took a metal door hinge,


used a table saw that cuts metal (Yeah, apparently my dad has one.), and got this.


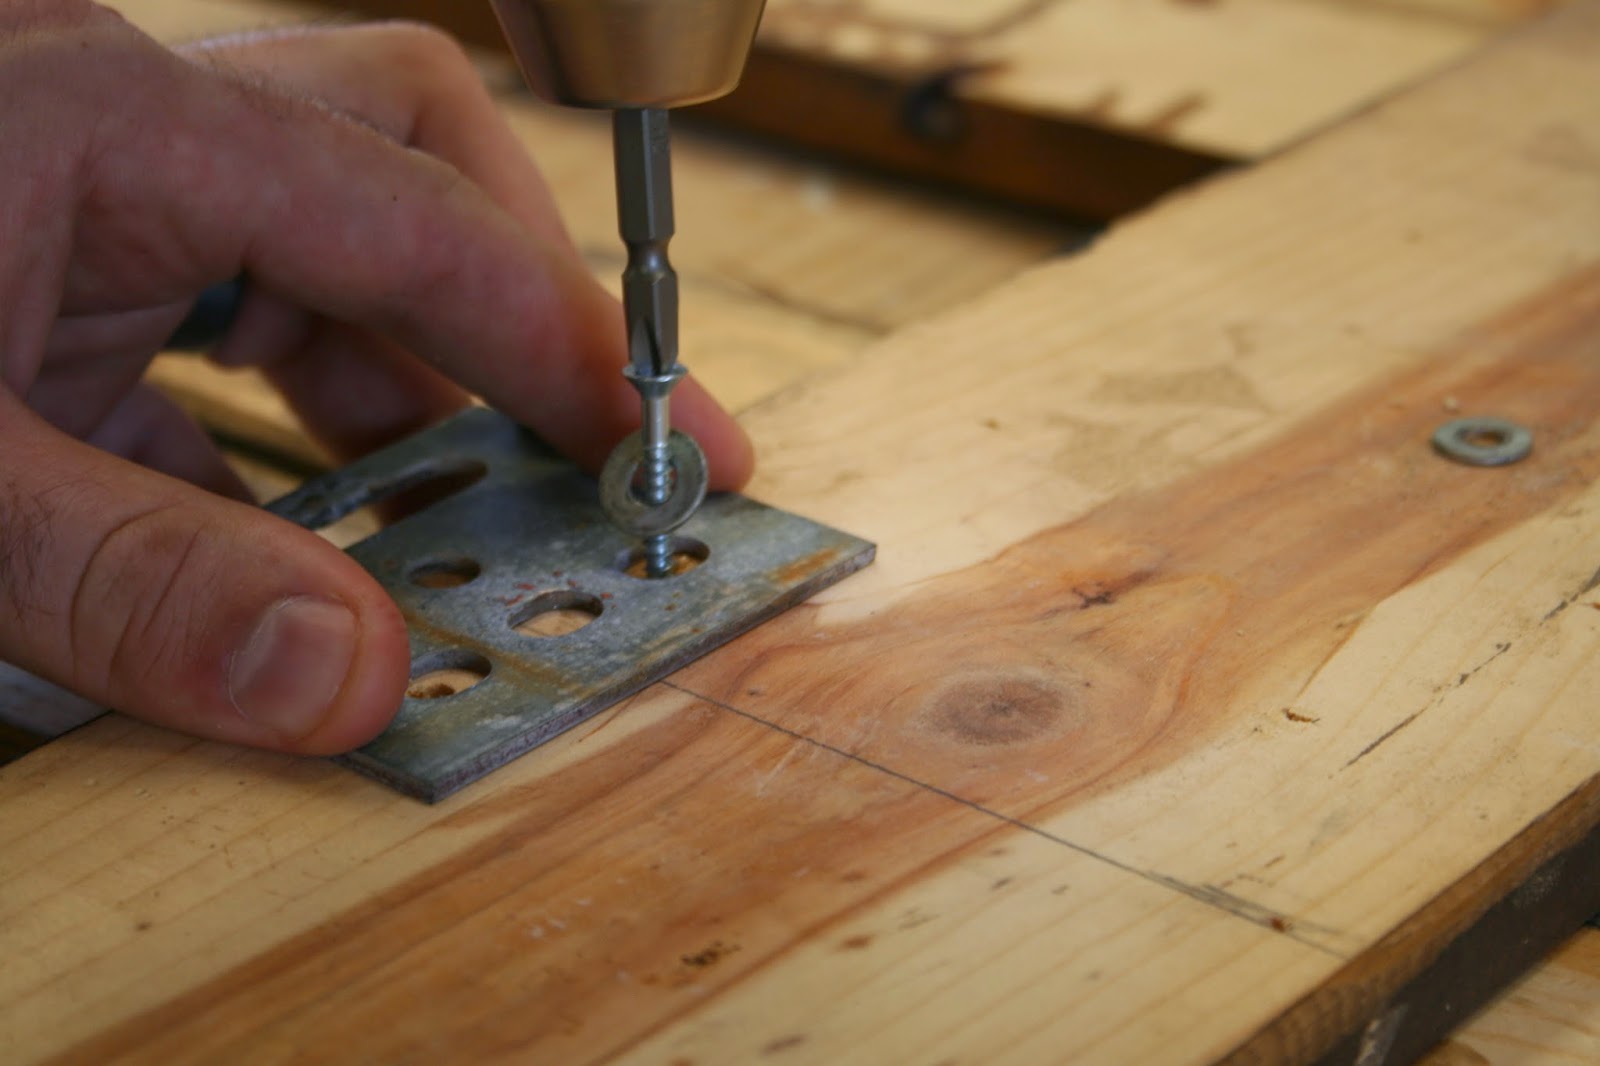
Then, J predrilled holes for the screws,


and used the drill to put in the screws.


We used washers as well as screws to make sure that there was a lip preventing the screws from not catching the outside of the holes on the metal bracket.

The last step was to hang it on the wall.

Yes, that is my 6'3" husband standing on a 4' (ish) table.
I told you the ceilings were high!

Here he is finding a stud. (I'm trying to avoid the pun.)

Look at that stud!
Ok, I couldn't resist.
Here he is marking the nail on the stud.


Ok, I'm going to stop my gawking and refrain from showing you the close ups I took next. What can I say? I love my man for many reasons. Building me things, carrying those heavy things, looking good, doing the hard parts...I'll stop now. =)

You may notice that the clock isn't standing up straight any more. We ended up cutting off the top & bottom of the last board. It was so long and the other end was short that your eye kept going to the left. But isn't it all worth it?


AHHHH!!!!!!!! I am obsessed with my new clock!! Thank you sooo much Hubs!!

Next, I just need to figure out what to decorate the table with. The clock is so lonely.